【Python】WebAPIを取得する「お天気アプリ」を作って解説してみた
takahide
初心者がITを楽しむブログ
おはようございます。タカヒデです。
本日はPythonで「PokeAPIを活用したポケモンの簡単なAPIアプリ」を作ってみました。
STEP形式で解説しているので、「まずは何かを作ってみたい」という初心者の方の参考になれば幸いです。
ぜひ実際にコードを打ちながら作成してみてください。
まずは、「ポケモンAPIアプリ」完成後の最終的なコードと完成イメージです。
import tkinter as tk
from tkinter import ttk
import json
import urllib.request
import base64

API_URL = "https://pokeapi.co/api/v2/pokemon/{}"


class PokeApp(tk.Tk):
    def __init__(self):
        super().__init__()
        self.title("PokeAPI Viewer")
        self.geometry("360x460")
        self.resizable(False, False)

        # 入力エリア
        frame = ttk.Frame(self, padding=12)
        frame.pack(fill="x")

        ttk.Label(frame, text="Enter Pokemon No").pack(anchor="w")

        row = ttk.Frame(frame)
        row.pack(fill="x", pady=6)

        self.no_var = tk.StringVar()
        self.entry = ttk.Entry(row, textvariable=self.no_var)
        self.entry.pack(side="left", fill="x", expand=True)
        self.entry.bind("<Return>", lambda e: self.fetch())

        ttk.Button(row, text="Show", command=self.fetch).pack(side="left", padx=8)

        # 表示エリア
        self.status_label = ttk.Label(self, text="", padding=12)
        self.status_label.pack()

        self.name_label = ttk.Label(self, text="", font=("", 18, "bold"))
        self.name_label.pack(pady=10)

        self.image_label = ttk.Label(self)
        self.image_label.pack(pady=10)

        # 画像参照保持
        self.photo = None

        self.entry.focus_set()

    def fetch(self):
        no = self.no_var.get().strip()

        if not no.isdigit():
            self.show_error("Please enter a number")
            return

        self.status_label.config(text="Loading...")
        self.update_idletasks()

        try:
            data = self.fetch_json(API_URL.format(no))
            name = data.get("name", "")
            sprite_url = data.get("sprites", {}).get("front_default")

            self.name_label.config(text=name)

            if sprite_url:
                self.photo = self.fetch_image(sprite_url)
                self.image_label.config(image=self.photo, text="")
                self.status_label.config(text="OK")
            else:
                self.show_error("No image")

        except urllib.error.HTTPError:
            self.show_error("Pokemon not found")
        except Exception:
            self.show_error("Error occurred")

    def fetch_json(self, url: str) -> dict:
        req = urllib.request.Request(url, headers={"User-Agent": "Mozilla/5.0"})
        with urllib.request.urlopen(req, timeout=10) as res:
            return json.loads(res.read().decode("utf-8"))

    def fetch_image(self, url: str) -> tk.PhotoImage:
        req = urllib.request.Request(url, headers={"User-Agent": "Mozilla/5.0"})
        with urllib.request.urlopen(req, timeout=10) as res:
            image_bytes = res.read()

        b64 = base64.b64encode(image_bytes).decode("ascii")
        img = tk.PhotoImage(data=b64)

        # 画像を2倍に拡大
        img = img.zoom(2, 2)

        return img

    def show_error(self, message: str):
        self.status_label.config(text=message)
        self.name_label.config(text="")
        self.image_label.config(image="", text="")
        self.photo = None


if __name__ == "__main__":
    app = PokeApp()
    app.mainloop()
こんなアプリが作れます。
このアプリは、「pokeAPI」というポケモンのAPIを活用したアプリです。
ポケモンの「No」を入ると、その番号に対応するポケモンの「英語名」と「画像」を表示します。
特に何かに使えるわけではないですが、大人の方は懐かしいポケモンを探してみてください。
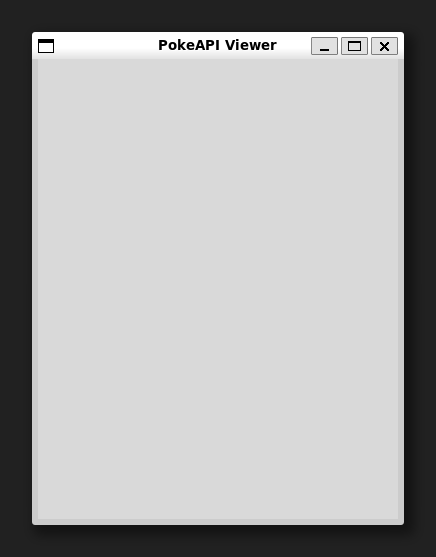
このSTEPでは、GUIウィンドウを起動し、表示エリアだけを作ります。
import tkinter as tk
from tkinter import ttk


class PokeApp(tk.Tk):
    def __init__(self):
        super().__init__()

        self.title("PokeAPI Viewer")
        self.geometry("360x460")
        self.resizable(False, False)

        self.status_label = ttk.Label(self, text="", padding=12)
        self.status_label.pack()

        self.name_label = ttk.Label(self, text="", font=("", 18, "bold"))
        self.name_label.pack(pady=10)

        self.image_label = ttk.Label(self)
        self.image_label.pack(pady=10)


if __name__ == "__main__":
    app = PokeApp()
    app.mainloop()
class PokeApp(tk.Tk):
    def __init__(self):
        super().__init__()
「tk.Tk」は、アプリのメイン画面そのものを表すクラスです。
「PokeApp」を「tk.Tk」の子クラスにすることで、「PokeApp」がウィンドウとして動くようになります。
self.title("PokeAPI Viewer")
self.geometry("360x460")
self.resizable(False, False)
self.status_label = ttk.Label(self, text="", padding=12)
self.status_label.pack()
self.name_label = ttk.Label(self, text="", font=("", 18, "bold"))
self.name_label.pack(pady=10)
self.image_label = ttk.Label(self)
self.image_label.pack(pady=10)
「Label」は「文字や画像を表示する部品」です
このアプリでは、表示内容が3つあるためラベルを3つ用意しています
「pack」は部品を上から順番に並べる配置方法です。「pady」は上下の余白で、見た目の詰まりを減らします。
この時点ではアプリのウインドウのみが作成できています。
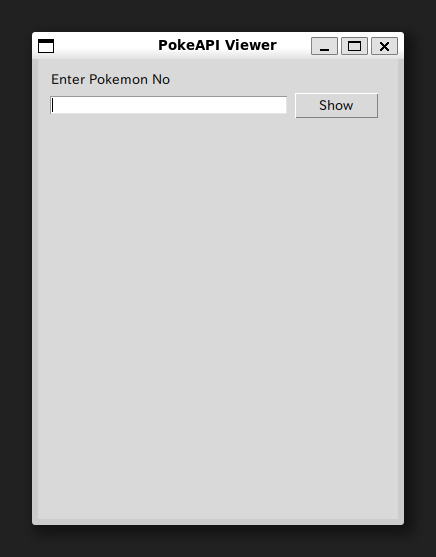
このSTEPでは、ポケモンNoを入力するための入力欄と、「Show」ボタンを追加します。
import tkinter as tk
from tkinter import ttk
class PokeApp(tk.Tk):
    def __init__(self):
        super().__init__()
self.title("PokeAPI Viewer")
self.geometry("360x460")
self.resizable(False, False)
# STEP2追加
frame = ttk.Frame(self, padding=12)
frame.pack(fill="x")
ttk.Label(frame, text="Enter Pokemon No").pack(anchor="w")
row = ttk.Frame(frame)
row.pack(fill="x", pady=6)
self.no_var = tk.StringVar()
self.entry = ttk.Entry(row, textvariable=self.no_var)
self.entry.pack(side="left", fill="x", expand=True)
self.entry.bind("<Return>", lambda e: self.fetch())
ttk.Button(row, text="Show", command=self.fetch).pack(side="left", padx=8)
self.status_label = ttk.Label(self, text="", padding=12)
self.status_label.pack()
self.name_label = ttk.Label(self, text="", font=("", 18, "bold"))
self.name_label.pack(pady=10)
self.image_label = ttk.Label(self)
self.image_label.pack(pady=10)
# STEP2追加
self.photo = None
self.entry.focus_set()
# STEP2追加
def fetch(self):
pass
if __name__ == "__main__":
app = PokeApp()
app.mainloop()
frame = ttk.Frame(self, padding=12)
frame.pack(fill="x")
「Frame」は、部品をまとめる箱です。
先に入力まわりの部品を「frame」にまとめます。「fill=”x”」にすると、横方向いっぱいに広がります。
row = ttk.Frame(frame)
row.pack(fill="x", pady=6)
入力欄とボタンは横に並べたいので、「row」という別の箱を作ります。
この箱の中で「左に入力欄、右にボタン」を配置します。
self.no_var = tk.StringVar()
self.entry = ttk.Entry(row, textvariable=self.no_var)
「StringVar」は、入力欄の中身を入れておく変数です。
「Entry」に「textvariable」を渡すと、入力欄の文字が「self.no_var」に自動で反映されます。
これによって、後で「self.no_var.get()」で値を取り出せるようになります。
self.entry.bind("<Return>", lambda e: self.fetch())
ttk.Button(row, text="Show", command=self.fetch).pack(side="left", padx=8)
「bind」は、キー操作に対する反応を設定します。
ここではEnterを押したら「fetch」を呼ぶようにしています。
ボタン側は「command=self.fetch」により、クリックで「fetch」が呼ばれます。
この時点では呼び出し先の「fetch」は何もしませんが、次のSTEPで中身を作ってきます。
self.photo = None
self.entry.focus_set()
「PhotoImage」は、参照が切れると表示が消えることがあるため「self.photo」のように「クラス内に保持する場所」を用意しておきます。
「focus_set 」起動直後に入力欄へカーソルを置き、すぐ入力できるようにします。
このSTEPでは入力欄とボタンが作成されました。
このSTEPでは、入力されたNoを取り出して「数字かどうか」をチェックします
正しい入力なら「Loading…」を表示し、誤りならエラーメッセージを表示して処理を止めます。
import tkinter as tk
from tkinter import ttk
class PokeApp(tk.Tk):
def __init__(self):
super().__init__()
self.title("PokeAPI Viewer")
self.geometry("360x460")
self.resizable(False, False)
frame = ttk.Frame(self, padding=12)
frame.pack(fill="x")
ttk.Label(frame, text="Enter Pokemon No").pack(anchor="w")
row = ttk.Frame(frame)
row.pack(fill="x", pady=6)
self.no_var = tk.StringVar()
self.entry = ttk.Entry(row, textvariable=self.no_var)
self.entry.pack(side="left", fill="x", expand=True)
self.entry.bind("<Return>", lambda e: self.fetch())
ttk.Button(row, text="Show", command=self.fetch).pack(side="left", padx=8)
self.status_label = ttk.Label(self, text="", padding=12)
self.status_label.pack()

self.name_label = ttk.Label(self, text="", font=("", 18, "bold"))
self.name_label.pack(pady=10)

self.image_label = ttk.Label(self)
self.image_label.pack(pady=10)
self.photo = None
self.entry.focus_set()
# STEP3変更
def fetch(self):
no = self.no_var.get().strip()
if not no.isdigit():
self.show_error("Please enter a number")
return
self.status_label.config(text="Loading...")
self.update_idletasks()
# STEP3追加
def show_error(self, message: str):
self.status_label.config(text=message)
self.name_label.config(text="")
self.image_label.config(image="", text="")
self.photo = None
if __name__ == "__main__":
app = PokeApp()
app.mainloop()
no = self.no_var.get().strip()
if not no.isdigit():
self.show_error("Please enter a number")
return
「isdigit」により「文字がすべて数字か」を判定します。
self.status_label.config(text="Loading...")
self.update_idletasks()
「config」は部品の設定を変更する方法です。
ここでは「status_label」の表示文字を「Loading…」に変えています。
「update_idletasks」は、通信処理などで止まる前に、先に画面更新を反映させるための処理です。これにより、ボタンを押した瞬間に「Loading…」が見えるようになります。
def show_error(self, message: str):
self.status_label.config(text=message)
self.name_label.config(text="")
self.image_label.config(image="", text="")
self.photo = None
エラー時は「状態表示だけ残し、名前と画像を消す」動きにします。
この処理を「show_error」にまとめます。
実際にアプリを起動してみると、数字でない場合はエラー文が表示されていることが分かります。

このSTEPでは、PokeAPIにアクセスするためのURL定義と、APIが返すデータであるJSONを取得する関数を追加します。
import tkinter as tk
from tkinter import ttk
# STEP4追加
import json
import urllib.request
# STEP4追加
API_URL = "https://pokeapi.co/api/v2/pokemon/{}"
class PokeApp(tk.Tk):
def __init__(self):
super().__init__()
self.title("PokeAPI Viewer")
self.geometry("360x460")
self.resizable(False, False)
frame = ttk.Frame(self, padding=12)
frame.pack(fill="x")
ttk.Label(frame, text="Enter Pokemon No").pack(anchor="w")
row = ttk.Frame(frame)
row.pack(fill="x", pady=6)
self.no_var = tk.StringVar()
self.entry = ttk.Entry(row, textvariable=self.no_var)
self.entry.pack(side="left", fill="x", expand=True)
self.entry.bind("<Return>", lambda e: self.fetch())
ttk.Button(row, text="Show", command=self.fetch).pack(side="left", padx=8)
self.status_label = ttk.Label(self, text="", padding=12)
self.status_label.pack()

self.name_label = ttk.Label(self, text="", font=("", 18, "bold"))
self.name_label.pack(pady=10)

self.image_label = ttk.Label(self)
self.image_label.pack(pady=10)
self.photo = None
self.entry.focus_set()
def fetch(self):
no = self.no_var.get().strip()
if not no.isdigit():
self.show_error("Please enter a number")
return
self.status_label.config(text="Loading...")
self.update_idletasks()
# STEP4追加
data = self.fetch_json(API_URL.format(no))
self.status_label.config(text="OK")
# STEP4追加
def fetch_json(self, url: str) -> dict:
req = urllib.request.Request(url, headers={"User-Agent": "Mozilla/5.0"})
with urllib.request.urlopen(req, timeout=10) as res:
return json.loads(res.read().decode("utf-8"))
def show_error(self, message: str):
self.status_label.config(text=message)
self.name_label.config(text="")
self.image_label.config(image="", text="")
self.photo = None
if __name__ == "__main__":
app = PokeApp()
app.mainloop()
API_URL = "https://pokeapi.co/api/v2/pokemon/{}"
「API_URL」は「ポケモンNoをはめ込んで完成させるURL」です。
たとえば No が 25 なら、後で {} の部分が 25 になり、25番のデータ取得用URLになります。
毎回URLを手書きする必要がなくなり、入力値をそのまま使えるようになります。
data = self.fetch_json(API_URL.format(no))
「format」は{}の部分に値を入れる仕組みです。
「API_URL.format(no)」で、入力された番号に対応するURLを作ります。
このURLを「fetch_json」に渡すことで、JSONを取りに行けるようになります。
req = urllib.request.Request(url, headers={"User-Agent": "Mozilla/5.0"})
with urllib.request.urlopen(req, timeout=10) as res:
...
「Request」は「どのURLにアクセスするか」と「付け加える情報」をまとめたものです。
「headers」は「HTTPヘッダー」という追加情報で、「User-Agent」は「アクセスしてきたソフトの種類」を表します。
return json.loads(res.read().decode("utf-8"))
これで、数字を入力すると「OK」と表示されるようになります。

このSTEPでは、APIから取得したJSONの中から「name」を取り出し、画面に表示します。
あわせて、存在しない番号などの失敗に備えて、HTTPError をキャッチしてエラー表示できるようにします。
import tkinter as tk
from tkinter import ttk
import json
import urllib.request
API_URL = "https://pokeapi.co/api/v2/pokemon/{}"
class PokeApp(tk.Tk):
def __init__(self):
super().__init__()
self.title("PokeAPI Viewer")
self.geometry("360x460")
self.resizable(False, False)
frame = ttk.Frame(self, padding=12)
frame.pack(fill="x")
ttk.Label(frame, text="Enter Pokemon No").pack(anchor="w")
row = ttk.Frame(frame)
row.pack(fill="x", pady=6)
self.no_var = tk.StringVar()
self.entry = ttk.Entry(row, textvariable=self.no_var)
self.entry.pack(side="left", fill="x", expand=True)
self.entry.bind("<Return>", lambda e: self.fetch())
ttk.Button(row, text="Show", command=self.fetch).pack(side="left", padx=8)
self.status_label = ttk.Label(self, text="", padding=12)
self.status_label.pack()
self.name_label = ttk.Label(self, text="", font=("", 18, "bold"))
self.name_label.pack(pady=10)
self.image_label = ttk.Label(self)
self.image_label.pack(pady=10)
self.photo = None
self.entry.focus_set()
def fetch(self):
no = self.no_var.get().strip()
if not no.isdigit():
self.show_error("Please enter a number")
return
self.status_label.config(text="Loading...")
self.update_idletasks()
# STEP5変更
try:
data = self.fetch_json(API_URL.format(no))
name = data.get("name", "")
sprite_url = data.get("sprites", {}).get("front_default")
self.name_label.config(text=name)
self.status_label.config(text="OK")
except urllib.error.HTTPError:
self.show_error("Pokemon not found")
except Exception:
self.show_error("Error occurred")
def fetch_json(self, url: str) -> dict:
req = urllib.request.Request(url, headers={"User-Agent": "Mozilla/5.0"})
with urllib.request.urlopen(req, timeout=10) as res:
return json.loads(res.read().decode("utf-8"))
def show_error(self, message: str):
self.status_label.config(text=message)
self.name_label.config(text="")
self.image_label.config(image="", text="")
self.photo = None
if __name__ == "__main__":
app = PokeApp()
app.mainloop()
try:
...
except urllib.error.HTTPError:
...
except Exception:
...
API通信は、入力が正しくても「存在しない番号」などで失敗することがあります。
「try」に成功時の処理を書き、「except」に失敗時の処理を書くと、アプリが落ちずに画面へメッセージを出せます。
name = data.get("name", "")
「data」は辞書です。
「get」は指定したキーの値を取り出す方法で、キーが無い場合は第2引数の「””」を返します。
self.name_label.config(text=name)
「config」を使い、ラベルの表示文字を途中で変えれるようにします。
ボタンを押すたびに「name_label 」文字が更新され、ポケモン名が表示されます。
sprite_url = data.get("sprites", {}).get("front_default")
「sprites」はJSONの中で「画像情報のまとまり」です。
「get(“sprites”, {})」としておくことで、「sprites」が無い場合でも空の辞書になり、安全に次の「get」を呼べます。
この値は次のSTEPで画像表示に使います。
実行するとポケモンの英語名が表示されていることが分かります。
このSTEPでは、取得した画像URLがある場合だけ、画像取得処理へ進む形を作ります。
まだ画像の取得関数は作らず、まずは「画像がある時と無い時」で処理が分かれる状態にします。
import tkinter as tk
from tkinter import ttk
import json
import urllib.request
API_URL = "https://pokeapi.co/api/v2/pokemon/{}"
class PokeApp(tk.Tk):
def __init__(self):
super().__init__()
self.title("PokeAPI Viewer")
self.geometry("360x460")
self.resizable(False, False)
frame = ttk.Frame(self, padding=12)
frame.pack(fill="x")
ttk.Label(frame, text="Enter Pokemon No").pack(anchor="w")
row = ttk.Frame(frame)
row.pack(fill="x", pady=6)
self.no_var = tk.StringVar()
self.entry = ttk.Entry(row, textvariable=self.no_var)
self.entry.pack(side="left", fill="x", expand=True)
self.entry.bind("<Return>", lambda e: self.fetch())
ttk.Button(row, text="Show", command=self.fetch).pack(side="left", padx=8)
self.status_label = ttk.Label(self, text="", padding=12)
self.status_label.pack()
self.name_label = ttk.Label(self, text="", font=("", 18, "bold"))
self.name_label.pack(pady=10)
self.image_label = ttk.Label(self)
self.image_label.pack(pady=10)
self.photo = None
self.entry.focus_set()
def fetch(self):
no = self.no_var.get().strip()
if not no.isdigit():
self.show_error("Please enter a number")
return
self.status_label.config(text="Loading...")
self.update_idletasks()
try:
data = self.fetch_json(API_URL.format(no))
name = data.get("name", "")
sprite_url = data.get("sprites", {}).get("front_default")
self.name_label.config(text=name)
# STEP6変更
if sprite_url:
pass
else:
self.show_error("No image")
except urllib.error.HTTPError:
self.show_error("Pokemon not found")
except Exception:
self.show_error("Error occurred")
def fetch_json(self, url: str) -> dict:
req = urllib.request.Request(url, headers={"User-Agent": "Mozilla/5.0"})
with urllib.request.urlopen(req, timeout=10) as res:
return json.loads(res.read().decode("utf-8"))
def show_error(self, message: str):
self.status_label.config(text=message)
self.name_label.config(text="")
self.image_label.config(image="", text="")
self.photo = None
if __name__ == "__main__":
app = PokeApp()
app.mainloop()
self.name_label.config(text=name)
if sprite_url:
...
名前は必ず表示できるので、先に「name_label」を更新しています。
画像は「ある場合だけ」表示すればよいので、分岐の中に入れます。
こうしておくと、画像取得が失敗した場合に判断しやすくなります。
なお、この時点では「self.status_label.config(text=”OK”)」を削除しているので、名前を表示しても「OK」になりません。
if sprite_url:
pass
else:
self.show_error("No image")
「if sprite_url」は、URLが存在する時だけ「True」になります。
ここで分けておくと、画像が無いポケモンに当たった場合でもアプリが落ちずに済みます。
このSTEPでは、さほど変化が無いのでそのまま次に行きましょう。
このSTEPでは、画像URLからデータを取得し「tk.PhotoImage」に変換して画面に表示します。
このSTEPでアプリは完成です。もう少し頑張りましょう。
import tkinter as tk
from tkinter import ttk
import json
import urllib.request
# STEP7追加
import base64
API_URL = "https://pokeapi.co/api/v2/pokemon/{}"
class PokeApp(tk.Tk):
def __init__(self):
super().__init__()
self.title("PokeAPI Viewer")
self.geometry("360x460")
self.resizable(False, False)
frame = ttk.Frame(self, padding=12)
frame.pack(fill="x")
ttk.Label(frame, text="Enter Pokemon No").pack(anchor="w")
row = ttk.Frame(frame)
row.pack(fill="x", pady=6)
self.no_var = tk.StringVar()
self.entry = ttk.Entry(row, textvariable=self.no_var)
self.entry.pack(side="left", fill="x", expand=True)
self.entry.bind("<Return>", lambda e: self.fetch())
ttk.Button(row, text="Show", command=self.fetch).pack(side="left", padx=8)
self.status_label = ttk.Label(self, text="", padding=12)
self.status_label.pack()
self.name_label = ttk.Label(self, text="", font=("", 18, "bold"))
self.name_label.pack(pady=10)
self.image_label = ttk.Label(self)
self.image_label.pack(pady=10)
self.photo = None
self.entry.focus_set()
def fetch(self):
no = self.no_var.get().strip()
if not no.isdigit():
    self.show_error("Please enter a number")
    return
self.status_label.config(text="Loading...")
self.update_idletasks()
try:
data = self.fetch_json(API_URL.format(no))
name = data.get("name", "")
sprite_url = data.get("sprites", {}).get("front_default")
self.name_label.config(text=name)
# STEP7変更
if sprite_url:
self.photo = self.fetch_image(sprite_url)
self.image_label.config(image=self.photo, text="")
self.status_label.config(text="OK")
else:
self.show_error("No image")
except urllib.error.HTTPError:
self.show_error("Pokemon not found")
except Exception:
self.show_error("Error occurred")
def fetch_json(self, url: str) -> dict:
req = urllib.request.Request(url, headers={"User-Agent": "Mozilla/5.0"})
with urllib.request.urlopen(req, timeout=10) as res:
return json.loads(res.read().decode("utf-8"))
# STEP7追加
def fetch_image(self, url: str) -> tk.PhotoImage:
req = urllib.request.Request(url, headers={"User-Agent": "Mozilla/5.0"})
with urllib.request.urlopen(req, timeout=10) as res:
image_bytes = res.read()
b64 = base64.b64encode(image_bytes).decode("ascii")
img = tk.PhotoImage(data=b64)
img = img.zoom(2, 2)
return img
def show_error(self, message: str):
    self.status_label.config(text=message)
    self.name_label.config(text="")
    self.image_label.config(image="", text="")
    self.photo = None
if __name__ == "__main__":
app = PokeApp()
app.mainloop()
with urllib.request.urlopen(req, timeout=10) as res:
    image_bytes = res.read()
画像URLにアクセスすると、返ってくるのは画像ファイルの中身です。
「res.read()」で画像データをバイト列として受け取ります。
この時点ではまだ「tkinter」が扱える形ではありません。
b64 = base64.b64encode(image_bytes).decode("ascii")
img = tk.PhotoImage(data=b64)

img = img.zoom(2, 2)「PhotoImage」は、画像ファイルのパスだけでなく「base64化されたデータ」からも作れます。
「base64」は「バイナリデータを文字列として扱える形にする変換」です。
「decode(“ascii”)」は、「base64」の結果を文字列にして「PhotoImage」に渡せる形にします。
また、「zoom」は「画像を整数倍で拡大する」機能です。「zoom(2, 2) 」により横方向も縦方向も2倍にしています。
self.photo = self.fetch_image(sprite_url)
self.image_label.config(image=self.photo, text="")
「fetch_image」が返す「PhotoImage」を「self.photo」に入れて保持します。
その後「image_label」に設定すると、画像が表示されます。
self.status_label.config(text="OK")
このアプリでは「名前を出せた」だけではなく「画像も出せた」状態を成功として扱っています。
そのため、画像表示まで完了したタイミングでOKを出すようにしています。
最期にコメントを整えれば完成です。
以上でPythonで作る「ポケモンAPIアプリ」の完成です。
ぜひ、コードをコピペするのではなく、実際にコードを打って作ってみてください。
お疲れさまでした。